My interest in encaustic printmaking was prompted by several presentations I attended at the 2010 International Encaustic Conference in Provincetown, NJ. These sessions gave me a sense of what's possible, but you really get a handle on it when you start to create yourself. It is one fantastic freeing activity. The range of effects you can create is quite broad. I am interested in the process not to create finished prints but to create "papers" that I can later collage into my mixed media encaustic works.
I use the aluminum palette available from R&F Paints. You set the temperature at roughly 165 degrees and clear everything off the palette.You are not limited by the size of the palette because you can use a spot printing technique.You also don't have to fuse with a heat gun because you are working with the paper directly onto the palette and the encaustic is heated/fused as you go.

Encaustic ( beeswax, damar resin, pigment) in a solid form is used to apply colour to the "plate"/palette causing it to melt on contact. You can lay down bold bands of colour, draw and use subtractive approaches e.g., wipeout, use stencils, masks or stamps and build images in multiple layers. Overprinting produces layered depth.and you can also draw on the print with a variety of mediums like oil pastel, graphite, charcoal etc. Clear encaustic medium can be used to make thinner paper translucent which is a technique I am attracted to because it allows light to show through the paper. This is most effective when you have lots of white spaces/paper showing through This is highly desirable when you want to use the papers in mixed media work.
Once created the prints are easy to handle and store because the wax is absorbed in the paper and they can even be rolled. So here's a sampling of what I produced. Unfortunately I did not take step by step photos of my day. I will create a tutorial at a later date.
Wipe Out

Wipe Out and Stamping

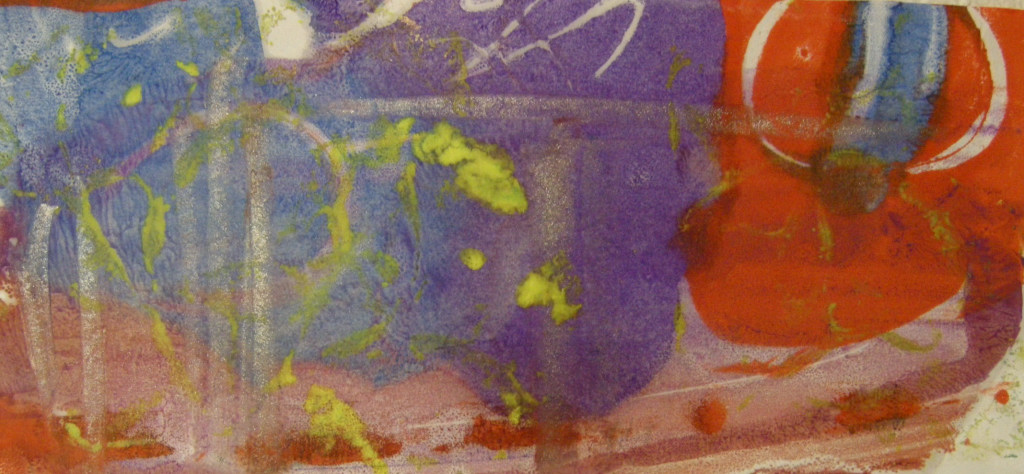
Layered print, purple is simple pick up ghost print (what was left on the palette after taking one print)with some wiping out with an eraser. Second (yellow) was created with a stamp made by gluing textured wallpaper onto an MDF block and pressing it into a yellow puddle of encaustic and stamping onto the first layer (paper is on the palette when you do this). It worked like a charm.
Stamping Positive and Negative


This is a print of what was left on the palette after the previous print was made. The bottom is over printing done in the same way as the previous print. I'm not claiming this is great art... but I now know how to achieve certain effects and I'm very excited about tearing these into different pieces and using them in an encaustic painting.


More complex prints still using bubble wrap to stamp the paper . You can see over stamping with silver on the top one.

The final one is showing a little more finess in the use of the bubble wrap. I guess you could call these layered monotypes because there will only be one created.
There's more to come from my initial session. I'm feeling quite liberated by these processes and can't wait to create more work.
5 comments:
Very interesting process! I really enjoyed reading this and seeing the photos helps. Sadly the damar really bothers my lungs so no encaustics for me! I'll just admire your works. Thanks.
The process is that you design and melt the encaustic on a hot plate type of palette then transfer the image by pressing paper onto the heated wax? Also does this process give off toxic fumes requiring safety respirator to be worn?
Hugs, p.s. I like the colour and pattern in your first image.
I too am worried about the fumes, so many "safe" products are anything but that, so I would probably never do this in my kitchen, but if I could get to a class, just to try it for myself ............... This looks like it has lots of possibilities! Thank you for your clear explanation.
In answer to the questions posed in comments...
Encaustic is safe to use if you keep everything at the correct temperature which I am obsessive about. You need an exhaust system (fan mounted in an open window and a source of fresh air) to be sure. I have very fussy lungs and could never use this medium if it was overly irritating. You do not need to use a respirator.
As an example, I cannot tolerate the solvents used in oil painting and get wheezy almost right away when exposed to them. Encaustic has not had this effect on me. There's lots of great safety information on R&F Homemade paints site. http://www.rfpaints.com/index.php?option=com_content&view=article&id=234&Itemid=330
You have to remember that encaustic also uses pigments so all the precautions you use with cobalts, cadmium etc. must be followed.Hope this helps.
Superb post! House painting Seattle
Post a Comment